How to Set Up Live Audio and Captions in MJET Labs

How to Set Up Live Audio and Captions in MJET Labs
At a church service, conference, or community event, your audience may need to follow the same speaker in several languages. MJET Labs lets attendees listen to translated audio and read live captions on their own devices.
This tutorial walks you through connecting your audio, choosing languages, and sharing the listener page. We'll use a microphone or audio input connected to your computer.
The screenshots below show the running local app with a test account. The audio input is a browser test microphone, and the viewer page is shown before translation starts. The pictured link and QR code point to localhost; share the link and QR code from your own event.
Green numbered highlights mark the controls used in each step.
Before you begin
Have these ready:
- An MJET Labs account with translation credit available in your wallet. You can add credit in Settings → Billing.
- A computer with an internet connection and a microphone, USB audio interface, or mixer that appears as an audio input on that computer.
- A phone and headphones to test the audience experience.
For an event with a sound system, use a feed from the mixer through an audio interface. A direct feed helps keep the speaker's voice clear, instead of capturing the room through a laptop microphone.
1. Create your audio stream
- Open your MJET Labs dashboard.
- Click New Stream.
- Select Microphone or audio input.
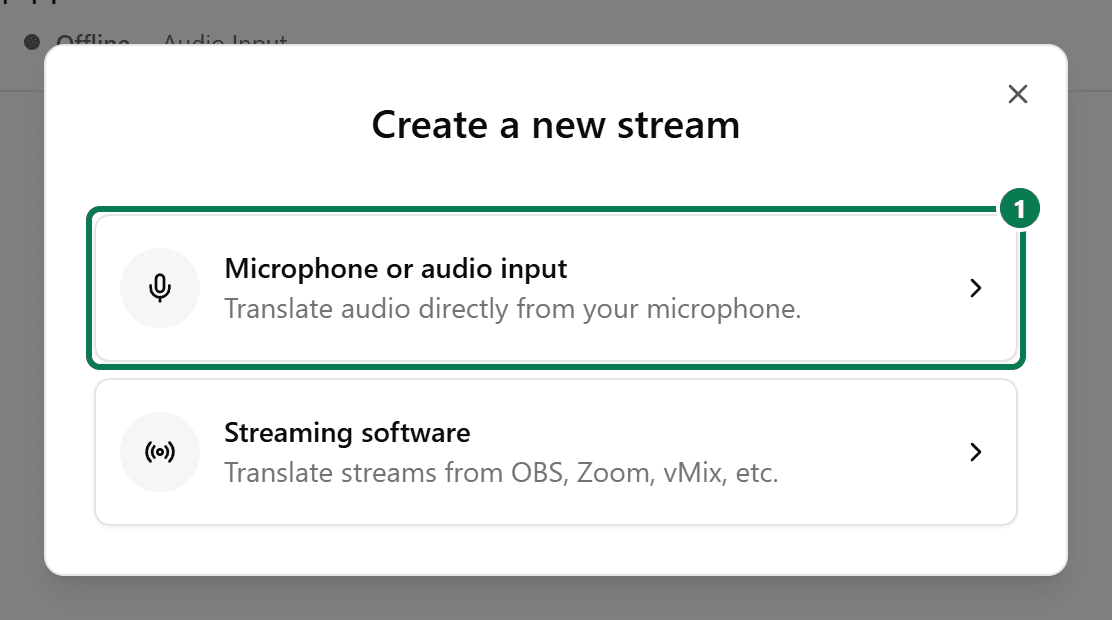
1: Choose Microphone or audio input to translate audio from your connected device.
On the stream page, find the Live venue audio card. This is where you'll choose the input and start translation.
2. Connect and check your audio input
- Connect your microphone or audio interface to the computer.
- In Live venue audio, click Allow microphone access if prompted.
- Allow access in your browser.
- Choose the correct device under Audio input.
- Speak into the microphone and watch the input level indicator beside the selector.
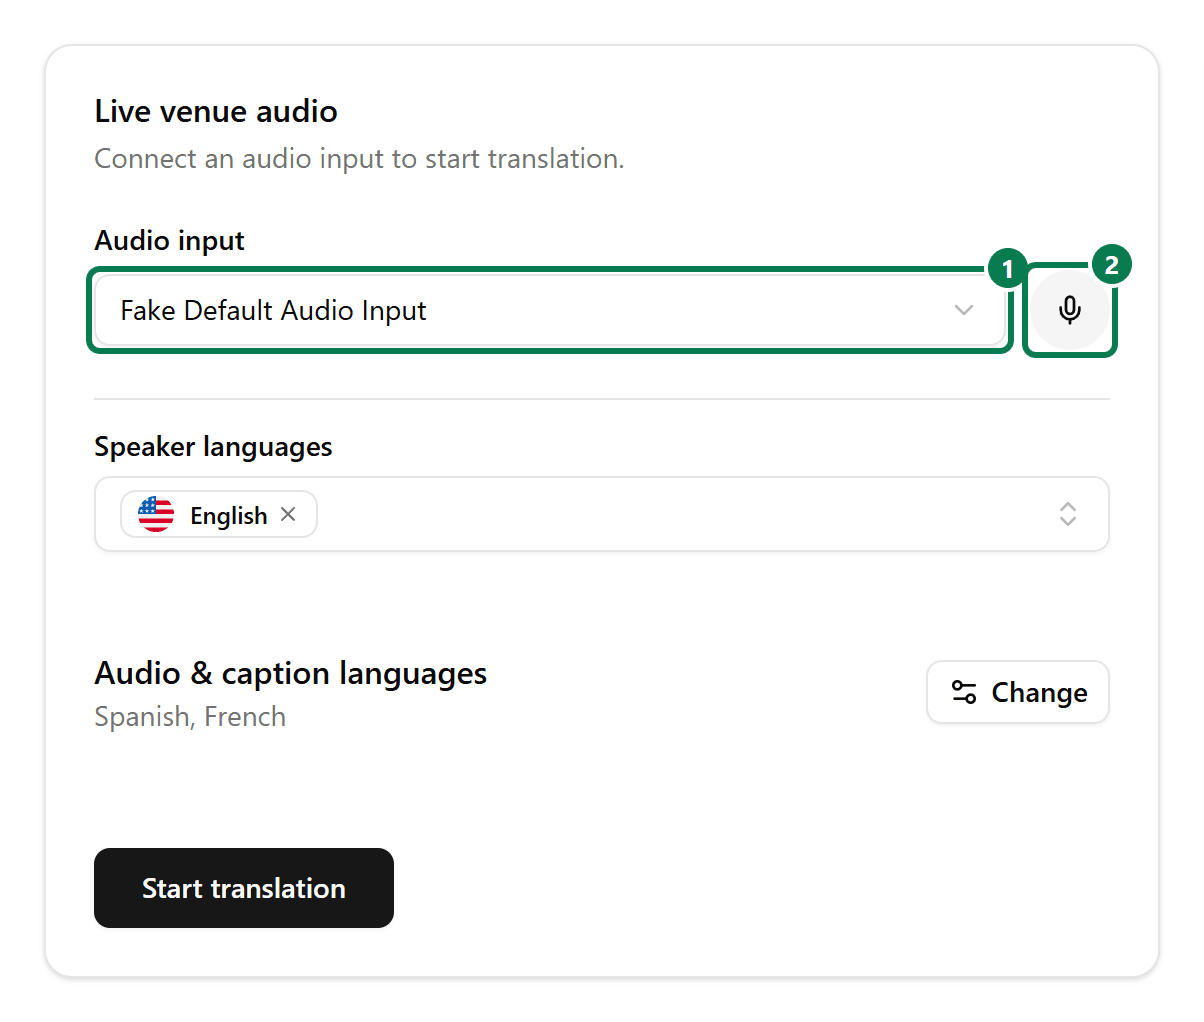
1: Select your input. 2: Check that the level indicator responds to speech. This example uses English as the speaker language.
If you're using a mixer, confirm that the speaker's microphone is routed to the output feeding your computer. The input indicator should respond when the speaker talks.
Use headphones when testing translated playback near the microphone. This helps prevent the translated voice from feeding back into the input.
3. Choose speaker and audience languages
There are two language settings: what the speaker speaks and what your audience receives.
Under Speaker languages, select the language or languages your speakers will use, or leave Auto-detect selected. Finish this before starting translation; speaker languages cannot be changed while translation is running.
Next, click Change beside Audio & caption languages:
- Select the languages you want attendees to choose from.
- Adjust the available voice settings if you want to customize translated speech.
- Click Save changes.
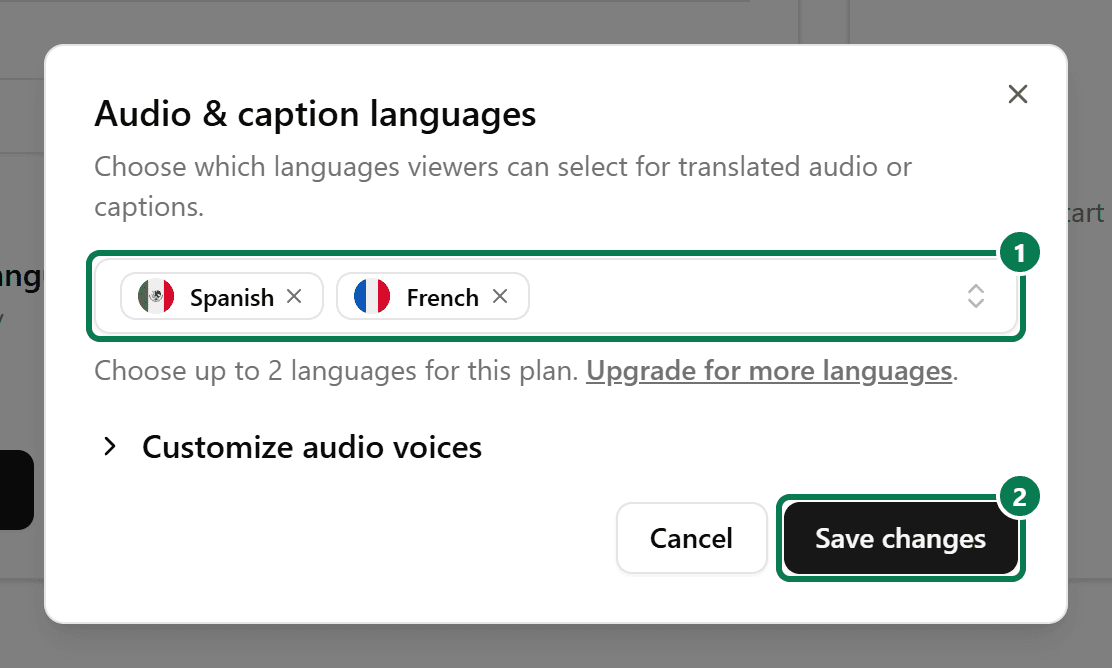
1: Select the languages your audience needs. 2: Save changes. This example offers Spanish and French.
For example, if your speaker uses English and your audience needs Spanish and French, set English as the speaker language and select Spanish and French as audience languages.
The number of audio and caption languages you can enable depends on your plan. All languages is available on plans without a language limit. If you only need original-language captions, you can leave translated languages unselected when original captions are supported for your speaker settings.
4. Start translation
Click Start translation, then speak a few complete sentences into your selected input. Allow the connection to finish preparing before checking playback.
Keep the broadcasting page open and the computer connected throughout the event. To pause the microphone during a break, use Mute, then Unmute when the speaker resumes. When the event ends, click Stop translation.
To change the audio input or speaker languages, stop translation, make your changes, and start again.
5. Share the listener link or QR code
Open Share livestream from your stream's toolbar. The dialog contains your Viewer link and a QR code for the same public page.
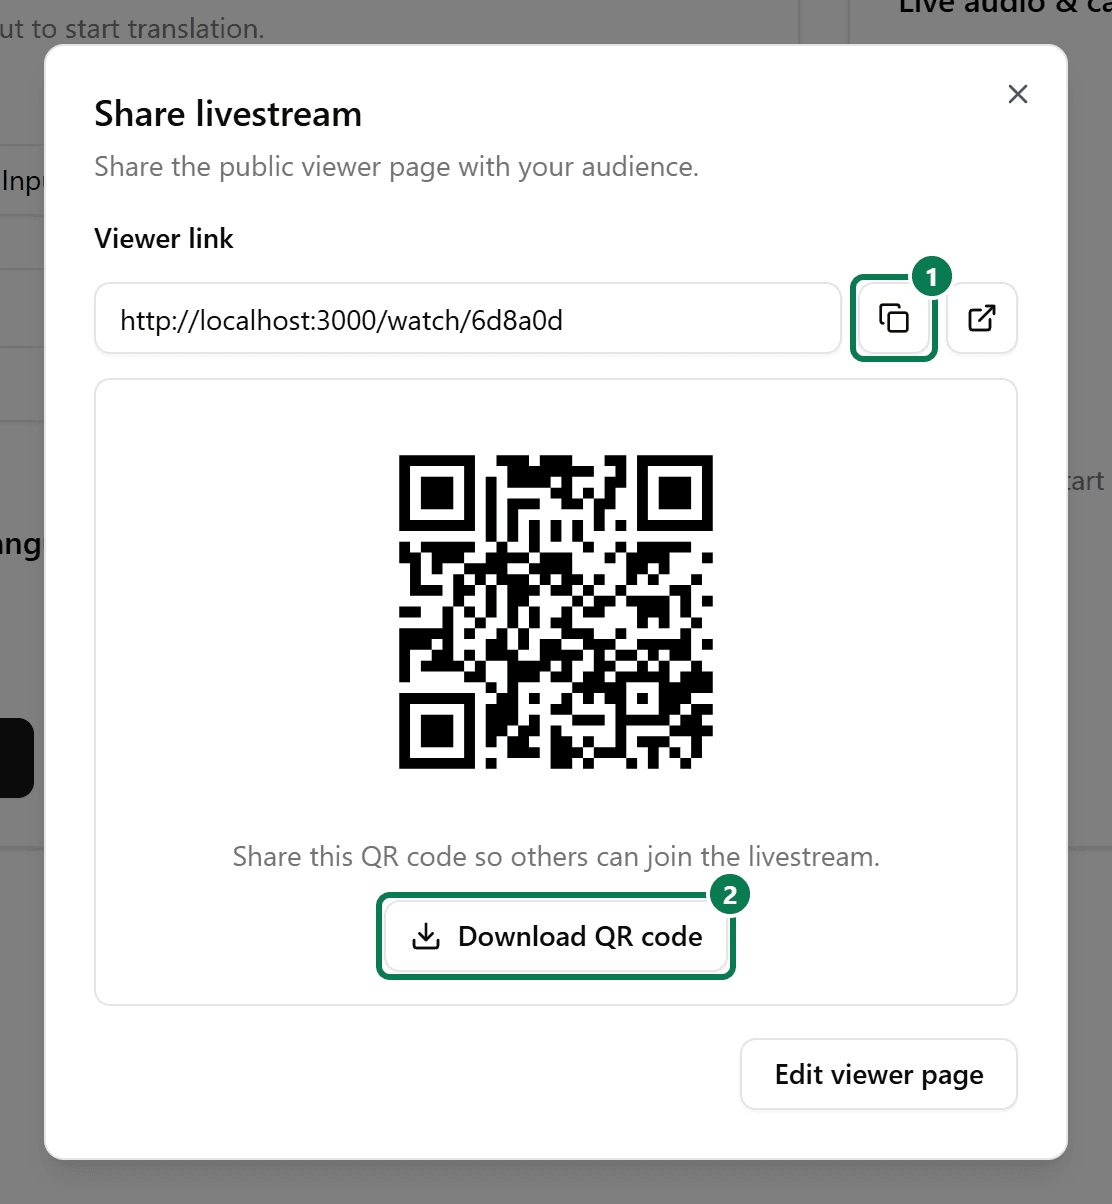
1: Copy your viewer link. 2: Download the QR code. The pictured code points to the local test account's viewer page.
If it says Viewer page is off:
- Click Edit viewer page.
- Turn on Enable viewer page.
- Set the page and link names as needed, then save your changes.
- Return to the sharing dialog.
Copy the viewer link into your event message, or display the QR code where attendees can scan it. Explain that they should open the page, choose a language, and press play. Headphones let them listen without disturbing people nearby.
6. Test what your audience receives
Before the event, open the viewer link on your phone:
- Choose one of the enabled languages.
- Press play.
- Listen through headphones while someone speaks into the connected microphone.
- Check that translated text appears and the spoken translation is audible.
- Repeat for the other languages you plan to offer.
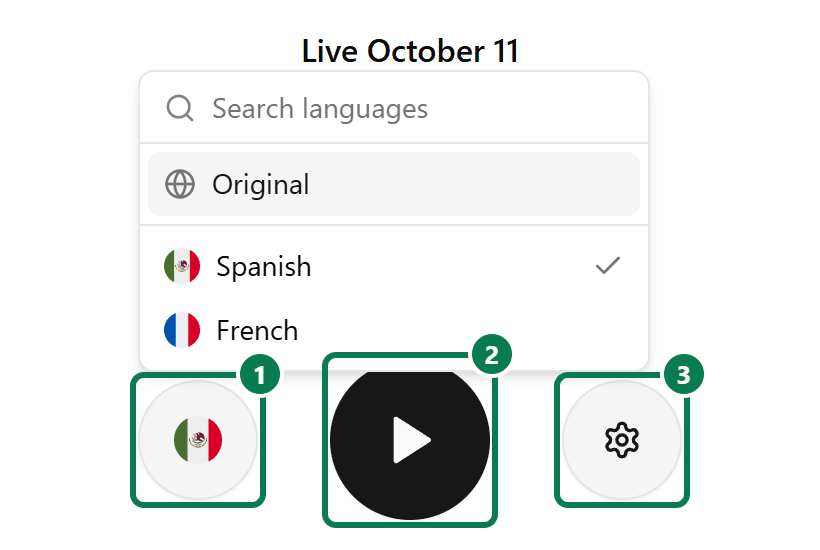
1: Choose a language. 2: Press play. 3: Open Viewer preferences to adjust Sound or Show original. Live text appears once speech is being translated.
For a captions-only experience, open Viewer preferences and turn Sound off. When viewing a translation, attendees can also enable Show original to see the original text alongside it.
Test with the microphone, mixer routing, and network you'll use during the event. A successful laptop microphone test won't confirm that your venue's mixer feed is working.
Troubleshooting
My audio input is missing. Check the device connection and microphone permissions. If MJET Labs shows a permission or device error, correct it and click Try again.
The input level isn't moving. Check that you selected the correct device, that the microphone is unmuted, and that your mixer is sending audio to the computer.
Attendees can see text but can't hear audio. Ask them to press play, enable Sound in Viewer preferences, and check their device volume and headphone connection.
A language isn't available on the viewer page. Check Audio & caption languages, save the selection, and confirm that it fits your plan's language limit.
Captions haven't appeared yet. Confirm that translation has started, the microphone is unmuted, and the input indicator responds to speech. Check the connection status on the viewer page and try a few complete sentences.
Add captions to a production screen
If you also want a dedicated caption display for your production setup, open Caption display on your stream page. Choose an available language, adjust the appearance, and copy the display link.
For instructions on adding that link to your production software, see How to Add a Live Subtitle Overlay to Your Stream.
Before opening the doors, confirm three things: your input responds to speech, each audience language works on the viewer page, and the shared link or QR code opens the correct event.